Building a game in C++ (Part 2)
In Part 1, I kicked off my journey into the world of C++ game programming by getting to grips with basic game development practices. I learned how to use SFML to draw textured sprites into a window, respond to events like the user pressing the directional arrow keys, and moving the player’s sprite around the screen by updating sprite positions. Basic stuff, but I feel a lot more confident now after drawing moving pixels into a window.
Before coding anything more, I decided to pause and think about what I want to create at the end of this. I said in the last part that I’m doing all this to have fun learning C++, which is still true, but now that I’ve got some fundamentals down I’d like to actually try to aim at something to stretch where I want to go with this.
Check out the full game development series so far here: Building a game in C++.
Key game features
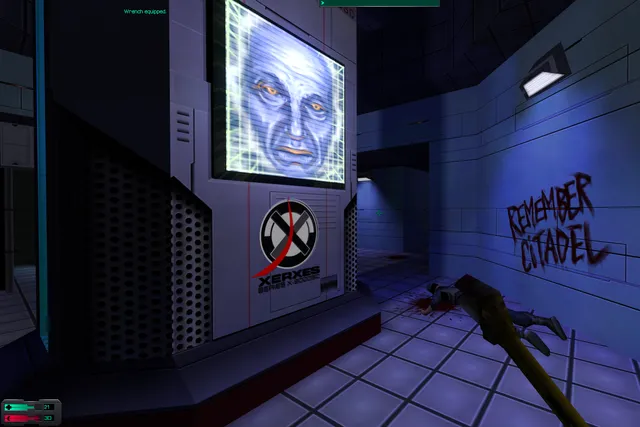
I considered the direction I wanted to move in and I chose to focus on building a Sci-fi Roguelike/RPG game that’s heavily inspired by the 1999 PC game System Shock 2.
SS2 blended elements of first-person shooter, survival horror and role-playing game genres, all wrapped up in a dark sci-fi setting. I get incredibly nostalgic thinking about the experiences I had growing up playing it, so I’m absolutely looking at it through ruby-tinted glasses! The important thing though is it’s a theme I really dig and I can envisage portraying in a 2D game.
I’d like to put my own spin on things, so I won’t be remaking this decades-old game (please, Nightdive, do it soon!), but instead I’ll try to capture some of the aspects that I remember fondly.
Below are a few ideas I’ve had so far.
Multiple skills, finite resources
SS2 was very re-playable because you built your own character by levelling up different skills to become more effective in a specific area, but it deliberately gave you only enough points in a single playthrough to maximise one or two areas. This meant you’d probably be curious what the game would be like if you’d decided to spec your character differently, so you’d want to play it again. I prefer this over letting the player eventually get every skill available, because it means every skill point is valuable and it makes you think carefully about your character progression.

Speaking of finite resources, inventory management was also a big deal, so much so that every item would use up some of your inventory space. You had to play Tetris to fit everything in once you had a few large items. I’m not a big fan of such manual inventory , but in general I like the idea of limiting the player’s carrying capacity to encourage thinking carefully about what items to keep or drop.
Brutal mechanics
SS2 wasn’t easy. It forced new players to creep around, perk up their ears to the slightest of noises and constantly watch their back. This was partly because of the horror elements, but mainly because it was such a punishing game to play. You had very limited health and resources throughout, and enemies had harsh attacks.
This is what I want in my game too: to keep players on their toes with mechanics that’ll constantly challenge them and punish slip-ups in a way that makes them think: “that could have been avoided with better play”.
Dark, claustrophobic settings
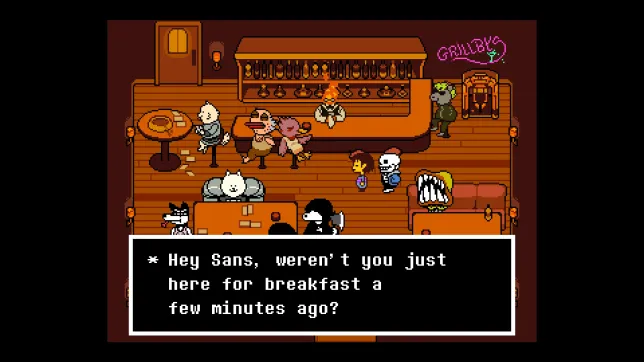
It’s impossible to think of the System Shock games without thinking about dark corridors, artificially-lit rooms and uncountable colourful buttons and bright monitors. I like these aesthetics and I’d like to see how far I can take them in a simple 2D game. There’s lots of other media out there with a similar vibe in movies, books and other games, so I’ll likely look for more inspiration and find a sweet spot that makes my game look and feel interesting to explore.
An engaging, twisty story
Whilst I don’t imagine I’ll be spinning a masterwork of script-writing, I would love to have a crack at piecing together an interesting plot that’ll keep players engaged and wondering what’s coming next. SS2 nailed it in my mind (my ruby-tinted lenses again?), with a “helpful” 3rd party that guides the player through the game with objectives and rewards (skill points), and a great plot twist in the middle that flips everything on its head. It’s also a great story in my mind because it has you questioning who’s really good or bad, and who deserves to live or die. You may not actually have the power to affect the outcomes, but
Roguelike aspects
The main aspect of Roguelikes that I’d like to incorporate would be procedural generation. I stumbled on some interesting stuff recently, such as wave function collapse, which is an algorithm for generating levels from an assortment of possible tiles. Otherwise if I feel like hand-crafted levels would be better for storytelling, I might try randomly generated enemies or items.
I may also think about interesting player death mechanics such as permadeath or revivals from a previously activated object like a healing station, such as in SS2.
Top-down 2D perspective
There’s a bunch of different ways of visualising a game in 2D, but I’d like to go for a top-down perspective with the side profile of characters and items visible from a single angle. Think of retro games like the original Pokemon series on Gameboy, or more recently a game like Undertale.
I’m undecided on the art style, although I’m leaning towards a pixel art look.
A game development project methodology
Before diving back into Visual Studio, I was recommended a video by YouTube’s lovely algorithm that I’d like to share. It’s given me a way of thinking about how I approach this and other side-projects I may do in the future.
https://www.youtube.com/watch?v=NsMHicoZTzQ
This is a great video to watch regardless of whether you’re building a game, a website, or anything else on your own.
The TL;DR for me is that I can think of dividing my time up into 2 different kinds of work: Prototyping and Production.
- Prototyping is about getting into code and actually building stuff. The idea is you plan features by building and testing to see if a concept will actually work in your context. In this phase, you build the systems that fit together in your project to make the core application work.
- Production is about producing content for your project. Things like building levels, creating textures and other assets, or writing the story for a game. These are what define the look and feel for end users. Depending on the product, spending more time here could make a much more interesting and engaging outcome.
There’s a line that can be drawn between these two phases, and this helps focus the mind on doing one thing at a time, working towards the end goal of having a finished product. When the line is blurred, it’s easy to fall into cycles of doing unenjoyable busywork.
Back into the code
All of the above have been big deviations from coding, but I think everything I’ve penned will help me moving forward on this project. Yes, I’m still mainly doing all this to learn C++, but I want to also enjoy building something I like!
Level tiling system
Previously, I coded up a really basic single-image texture background, but in my final game I’d like a system that builds levels out of tiles that are sourced from sprite sheets. The problem is, how will my game know which frames it should take from a sprite sheet to render levels?
A simple solution would be to use something like a tilemap. This is way of mapping out a 2D level tile by tile. Each tile can be set to a single value, which could be anything simple. For example, I might create a tilemap looking like this:
0 0 0 0 0 0
0 1 1 1 1 0
0 1 2 2 1 0
0 1 2 2 1 0
0 1 1 1 1 0
0 0 0 0 0 0
What does each number mean? As the developer, that’s up to me! I might decide that 0 equals a blank white tile, 1 equals a grey tile and 2 equals a green tile. My program can then parse through this tilemap and based on the number render the appropriate type of tile.
I was thinking of coding up a function that does this parsing, but luckily I did a little more research and found a program and a library that together solve a bunch of issues tilemaps throw up.
Tiled level editor
Tiled is a 2D level editor that’s completely separate from any game framework or renderer and saves its tilemaps in XML and CSV formats, making the data easy to parse and interpret in any way that a game needs to. Tiled actually solves a variety of problems I’d anticipated with regards to tilemaps, such as how I will edit levels and see the changes, and how I will manage different tile layers, which will be crucial for placing objects on top of the base level tiles.
Installing the tmxlite C++ library
Before manually parsing the Tiled tilemaps, I looked into C++ libraries and found tmxlite, which I liked because it handled the parsing and converting from the raw data into C++ objects that are easy to work with. It’s again completely decoupled from SFML or any other game libraries, so I’ll just need to turn the objects into drawable tiles.
I want to mention installation of this library because this was my first real test at bringing in external libraries without having a detailed guide. I started by cloning the entire repo outside my project (in the same directory where I had SFML files stored).
The guide talks about using CMake to build the required files needed for linking, but I chose to use Visual Studio. I opened up the tmxlite/tmxlite.vcxproj file, and then simply went to Build > Build tmxlite. After this, it produced files inside the build directory, which is mentioned in the console output. Importantly, it produced a .lib file inside x64/bin/DebugStatic.
Back in my own Visual Studio project, I opened the project Properties and added the following:
- Under C/C++ > General > Additional Include Directories, I added:
tmxlite\tmxlite\include - Under Linker > General > Additional Library Directories, I added:
tmxlite\tmxlite\x64\bin\DebugStatic - Under Linker > Input > Additional Dependencies, I added:
libtmxlite-s-d.lib
With these in place, I was then able to try out the basic tmxlite example shown here.
Creating a sprite sheet
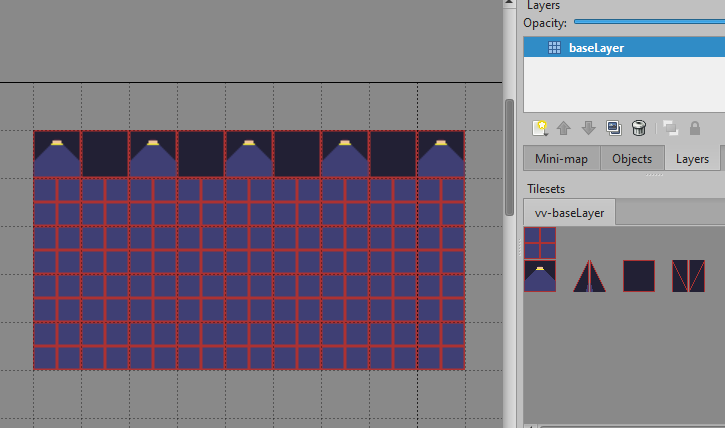
Something I knew I’d need to face eventually was creating my own graphics. I had a look around and found the program Aseprite to be a solid yet simple pixel art editor with handy features for game spritesheet creation and animation. It cost less than $20 SGD, so I took the plunge.
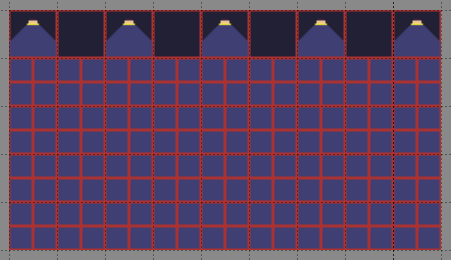
I did up a really basic spritesheet to work with initially, based on the virtual reality training levels in System Shock 2: dark backgrounds with stark neon lines. Nothing too fancy for now.
![]()
I saved this single graphic as a PNG and imported it into Tiled. Each tile I’d created within a 32x32 pixel square, so I set Tiled to parse it at that specific size per tile, and it worked well. I was able to start drawing tiles onto an orthogonal grid:
Bringing it all together
Once I’d saved my Tiled level, I was then able to import it into my game via the tmxlite library mentioned above. By using the tmxlite example code in their repo, I was able to quickly see how to iterate over each tile in the map. It was then just a matter of turning each tile into a Sprite object and saving them in a vector (a dynamically sized array).
Finally, I iterated over the sprites vector, passed each sprite to the window.draw() method on my original SFML window, et viola:
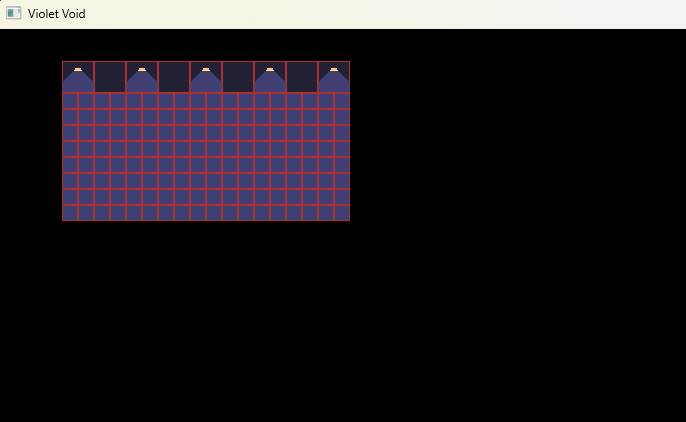
I was so chuffed to have my 2D Tiled map displaying in my window!
It was rendering the tiles as-is from the spritesheet, which meant each tile was 32x32 pixels in the window. I’ll need to investigate how best to scale the tiles. What I’d love is for SFML to handle scaling and positioning of the tiles inside a frame that I can move around (as opposed to being relative to the window), which would save me some extra calculations needed to get everything correctly aligned.
Basic level creation workflow
As a visual recap, here’s the workflow I’ve got working to go from raw pixels into the game:
stateDiagram-v2
	drawSprites : Draw tiles in Aseprite
	importIntoTiled : Import spritesheet into Tiled
	drawMap : Draw map in Tiled
	readTmx : Read TMX file into C++ game
	extractSpritesheet : Import spritesheet PNG linked in the TMX
	parseTiles : Parse tiles data
	storeTiles : Store vector of tile sprites
	renderTiles : Draw tile sprites based on their positions

	[*] --> drawSprites
	drawSprites --> importIntoTiled : Export spritesheet to PNG
	importIntoTiled --> drawMap
	drawMap --> readTmx : Save map as TMX
	readTmx --> extractSpritesheet
	readTmx --> parseTiles
	extractSpritesheet --> storeTiles : Set sprite texture
	parseTiles --> storeTiles : Set sprite position
	storeTiles --> renderTiles
	renderTiles --> [*]
Summary
I’m glad I put away my IDE for while to just think about what I wanted to make. It wasn’t enough to just say “a 2D game”. I see this as a golden opportunity to build something I’ve never built before and it’s something I’ve wanted to do for decades. My inspirational material from the late 90s game System Shock 2 has given me a much stronger desire to create this work that I can genuinely see myself enjoying the end result of.
Besides this, I’m still amazed I was able to string together a workflow that I can use to create graphics, build levels using them and render them into my game. This is a major bit of coding work that I would have had to do by hand if I hadn’t discovered Tiled.
In the last part I said I wanted to get a rough plan together, which I’ve been able to do. Next, I’ll continue to work in the “prototyping” phase and start building out systems to start making this an actual playable game. I’m also itching to do up some proper graphics for it, but I’m holding back on the artwork until I’ve got more of the core game together (and a graphics tablet that I’ve ordered from the US). A few things I want to get done in no particular order are:
- View scaling/positioning/panning (SFML Views perhaps)
- Better player movement and impediments (the player shouldn’t be able to walk through walls…)
- Interactive elements and items
- Interface elements for things like health, armour, etc
- Dialogue system
- Weapons/ways of inflicting damage
- Enemy characters
- Player skills and levelling
I don’t think I’ll get to most of these too soon, but these are all definitely on the roadmap.
Hope you enjoyed Part 2, keep an eye out of Part 3 in the coming week or so!
Credits
All the images from other games seen in this article were copied from various websites found via Google images. I, of course, don’t own the rights to those games and didn’t snap those screenshots personally.